Installing a Multi-Mode (YSF, D-Star, DMR) XLX Server on Ubuntu Server 20.04
17 January 2022
Tanner Sterling
After purchasing a Yaesu FT-70DR and playing around with YSF and XLX, I decided that I wanted to create my own XLX server on a recycled tower that I wasn't currently using. I started Googling around and found some great sites (listed below), but I couldn't find one using Ubuntu as the distro. So here we go!
The first thing we'll want to do is to update our software repository cache and then upgrade any packages (apps, libraries, etc.) that have an update available from the repos. We run this by the two following commands: (Why sudo?)
sudo apt updatesudo apt upgrade -yNext, we will want to download the actual XLX server application, which is called xlxd. We will also want to install some developer tools that we’ll use to compile the source code. We will also want to install Apache2 as our web server, if your Ubuntu server does not have it already installed. We’ll install these with the following commands:
sudo apt install git git-coresudo apt install apache2 phpsudo apt install build-essentialsudo apt install g++Now that we have our developer tools installed, lets create a folder for our source code called xlxd. First we’ll change to the root directory "/" and then create a folder named ‘xlxd’.
cd /sudo mkdir xlxdcd /xlxdNow that our folder is created and we have moved inside of it, we can download the xlxd source code from LX3JL’s GitHub repo with the following command:
sudo git clone https://github.com/LX3JL/xlxd.gitNow that we have the source code downloaded, we’ll want to modify a couple items in one of the config files named ‘main.h’ before compiling. This is important, as if you make these changes after the initial compile step, you will need to recompile and install your source code again for the changes to take effect.
Navigate to the folder containing the main.h config file:
cd /xlxd/srcUse your favorite text editor to edit the file. My favorite two editors are vim and gedit. They are both fairly light-weight, customizable, but not too bloated like a full-blown IDE that I used to use. Vim is great, but it has a steep learning curve. So if you haven’t used it before, I would recommend something like gedit or nano instead. Both are more similar to traditional text editors. I do encourage you to try out Vim at some point though. For some, it's a real life changer. The '-E' option for the 'sudo' command is to preserve the environment variables. This allows Vim to use my user's .vimrc file instead of the super-user's .vimrc file instead, that also probably doesn't exist. This keeps all my fancy Vim add-ons working properly.
sudo -E vim main.hEdit the lines 126 and 127 for your YSF hotspot frequency. My raspberry pi UHF hotspot operates on 445.525 MHz locally, so I set both lines to 445525000 as the file is looking for a value in Hz.
Edit lines 128 and 129 for your YSF reflector, which is built into xlxd configuration file now:
126 #define YSF_DEFAULT_NODE_TX_FREQ 445525000127 #define YSF_DEFAULT_NODE_RX_FREQ 445525000128 #define YSF_AUTOLINK_ENABLE 1129 #define YSF_AUTOLINK_MODULE ‘A’There are several more options and values that you can set in this file, but for our initial setup, we are only changing lines 126-129. Just remember if you come back to this file and make any changes, you will need to then recompile and install xlxd again.
We’ll also set our YSF reflector description that will be shown on the YSF reflector listings. Also note that your YSF reflector name in the listings will be your XLX number by default (XLX067). As of this writing, I do not know how to change this. You can only change the description as far as I know. This variable is a set text string of only 14 characters. The safest way to modify it is by changing each individual letter. Be careful not to add any more letters that do not already have a placeholder (between ‘ ‘). I just did a one-by-one letter replacement to add my QTH (Hastings, NE):
sudo -E vim cysfprotocol.cppEdit line 970:
uint8 description[] = { 'H','a','s','t','i','n','g','s',',','
','N','E',' ',' ' };
Compiling and Installing
We’ll now compile and install our source code with the following commands:
sudo make cleansudo makesudo make installPart of the compilation process creates our main script file also called ‘xlxd’. Let’s make a copy of this file and move it to /etc/init.d/ so that our system knows where to find it.
cp /xlxd/scripts/xlxd etc/init.d/xlxdBefore starting this new service named after the file, ‘xlxd’, let’s edit a couple of options.
cd /etc/init.d
sudo -E vim xlxd
Edit line 22:
ARGUMENTS=”XLX067 192.168.1.141 127.0.0.1”
Make sure to put your own XLX number instead of mine (XLX067). You’ll also want to use your own Ubuntu server’s local ip address instead of mine (192.168.1.141). Save this file and exit.
This script file ‘xlxd’ that is now located at /etc/init.d will be what we directly use to start/stop/restart the XLX Server using the built-in commands of systemctl (system control). We’ll get to those commands below.
We’ll now need to download a current copy of the XLX reflector listings (dmrid.dat) from the XLXAPI server. Our XLX server will retrieve this file automatically once running, but we'll need an initial copy of it for our XLX server to be able to start for the first time. We'll put this copy in our XLX Server folder (/xlx) by using the wget command:
cd /xlxsudo wget -O /xlxd/dmrid.dat
http://xlxapi.rlx.lu/api/exportdmr.phpWe’ll now tell Ubuntu Server to start this script file automatically on startup and manually start the XLX Server with systemctl since the system is already running:
sudo update-rc.d xlxd defaultssudo systemctl start xlxdIf everything went right, your XLX server should be up and running. You can check this by using systemctl again:
sudo systemctl status xlxd
If it is running properly, you should see statements like “active” and “running” (see figure above - click to enlarge). If it is not running, start by looking at the XLX server’s log notes at the bottom of systemctl’s output. Look for any error messages. When you are ready to leave, simply press the letter ‘q’ to return to the terminal prompt.
Installing the Web Dashboard
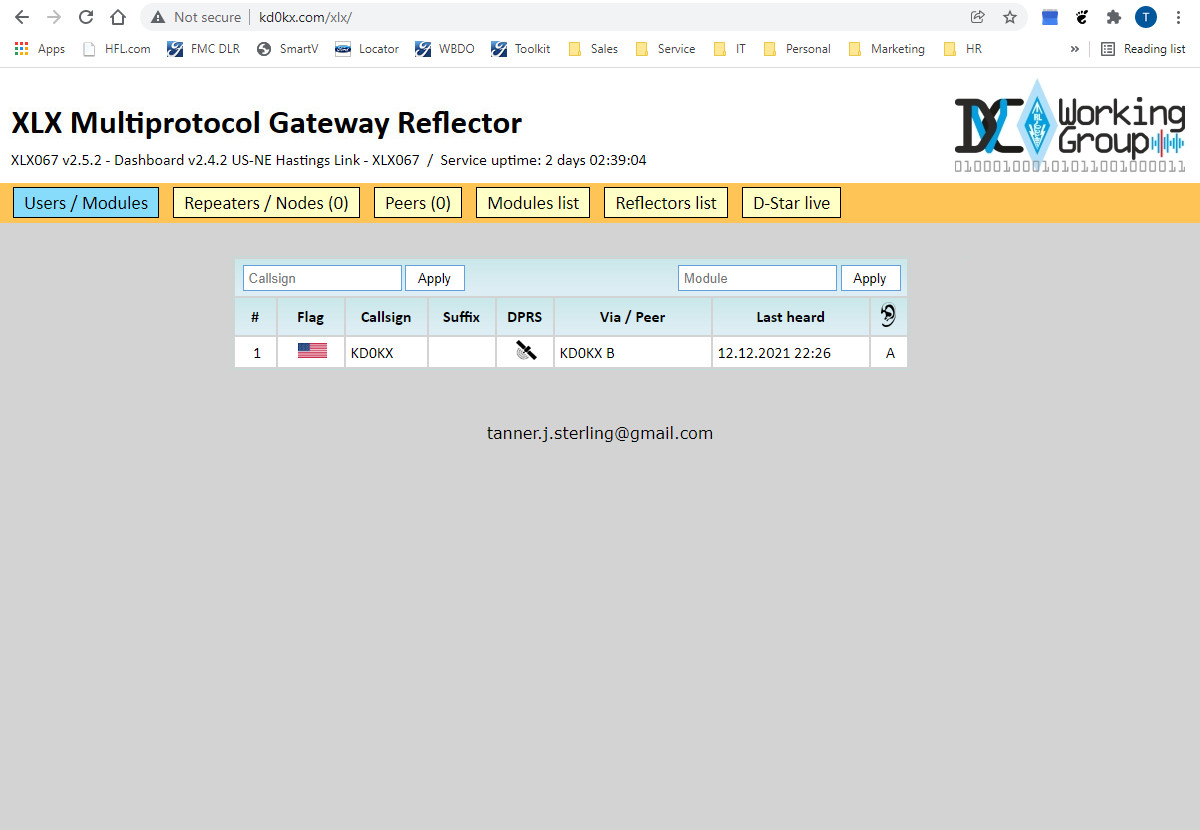
We’ll now work on setting up our web dashboard with the Apache2 web server app. Let’s start by creating a folder for our website files using sudo (super user-do) and then changing the ownership to our current user. Make sure to use your own user name instead of mine (tanner):
cd /var/wwwsudo mkdir xlxsudo chown tanner xlxNow that we have our website folder ready, let’s copy the dashboard files from the install direcotry (/xlxd):
cp -R /xlxd/dashboard/* /var/www/xlxNow let’s navigate back to our website folder and customize it’s configuration file for the dashboard:
cd /var/www/xlx/pgsvim config.inc.phpEdit line 18 and add your e-mail address.
Edit line 29 and change the value to ‘ShowLast1ByteOfIP’ (This hides the first three octets of the connected user’s IP address on your dashboard)
Edit line 34 and change the value to ‘ShowLast1ByteOfIP'
Change lines 40-43 if you want to change the name of your Modules. Leave as/is if you are unsure.
Edit line 47 for your own callsign.
Edit line 55 for what you want your header (title) of your dashboard to read.
Edit line 61 and use your FQDN address for your dashboard. This will just probably be your external IP address or your domain name from your DNS record. Mine is set to: 'http://www.kd0kx.com/xlx/'
Edit line 64 for your country and/or state. This is what will display in the XLX Server listings. I used “Nebraska, USA” to be a little more specific than just “USA”. This choice is up to you.
Edit line 65 for your server description displayed in the XLX Server listings. I recommend looking at the existing entries while searching for an open XLX server number in order to get some ideas. I made mine, “Hastings Link, Multi-Mode, Transcoding (WIP), YSF 83111, D-Star DCS067AL”. At this point, you still won’t know your YSF or DCS number. If you want that information in there, you’ll need to come back to this step later and update the config file again. You DO NOT need to recompile anything though and changes will take effect immediately after saving the config file and refreshing your browser.
Edit lines 73 and 74 if you are using a different LAN or WIFI adapter other than the default ‘eth0’. I did not need to change this line during my startup as I’m using the built-in Ethernet adapter, but if I add a Wi-Fi card later I would need to change it to most likely to ‘wlan0’. If you are unsure of what this should be, type 'sudo lshw -c network' in a terminal and look for 'logical name'.
Now that our dashboard is ready to go, let’s activate our new website (dashboard) in Apache. We’ll need to create a simple config file first for Apache. Start by moving to the config file directory /etc/apache2/sites-available:
cd /etc/apache2/sites-availableTo make things easier, start by copying the default config file. Change the owner to your user, and edit two lines for our needs. Make sure you are using your local linux user name instead of mine (tanner).
cp 000-default.conf xlx.confsudo chown tanner xlx.confvim xlx.confEdit line 11 and put your website’s contact email address, your personal e-mail most likely
Edit line 12 for your website root direcotry, in our case this is /var /www /xlx
Save and close this file. We’ll de-activate the default web browser (optional) and activate our new site with the Apache commands below. We’ll then use systemctl command to restart our web service through Apache. 'a2dissite' is short for 'Apache2 Disable Site', 'a2ensite' is similarly 'Apache2 Enable Site':
sudo a2dissite 000-default.confsudo a2ensite xlx.conf)sudo systemctl restart apache2If everything went well, we should have a running webserver. We can check this status with systemctl, similarly to how we did this for the XLX server earlier:
sudo systemctl status apache2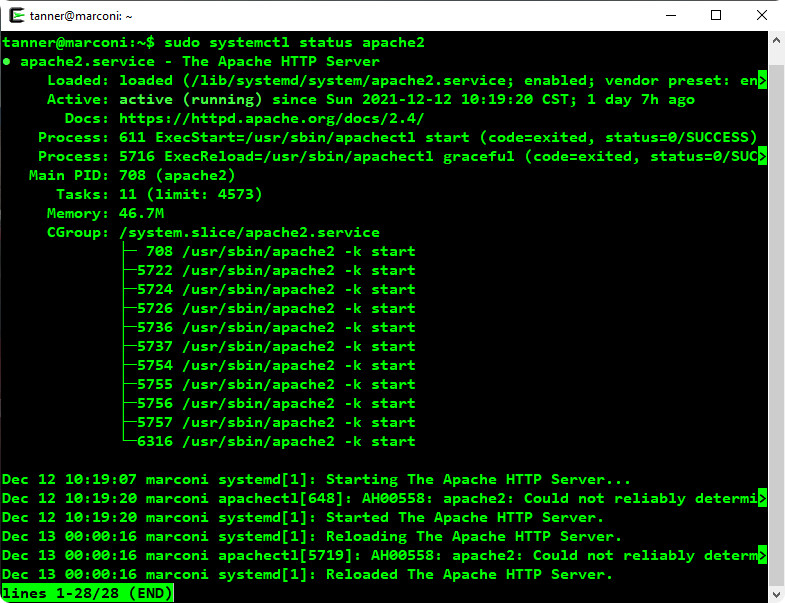
You’re looking for things like “loaded” and “active”. If soemthing is wrong, again start by reading Apache’s log comments towards the bottom of the systemctl’s output. When you are ready to leave, simply press the letter ‘q’ to return to the terminal prompt.
We now probably need to open some ports for our XLX and webserver to work properly. By default Ubuntu’s firewall named UFW is disabled. You can enable it if you want, but you will need to read up on how to allow ports through it. Add each port that we need below. If you leave ufw disabled, we should only have to make changes in your router’s port forwarding table. This will be somehwat specific to your brand of router. Start by logging into your router using a web broswer and the address 192.168.1.1
We’ll need the following ports along with telling the router where to send them, which will be your local ip address of your Ubuntu server machine. In my case, I setup my router to assign 192.168.1.141 per my server’s MAC address. Google up on this if you are not familiar with how to assign static IP addresses in you router.
You’ll need the following ports open (borrowed from LX3JL):
- TCP port 80 (http) optional TCP port 443 (https) TCP port 8080 (RepNet) optional
UDP port 10001 (json interface XLX Core)
UDP port 10002 (XLX interlink)
TCP port 22 (ssh) optional TCP port 10022
UDP port 42000 (YSF protocol)
UDP port 30001 (DExtra protocol)
UPD port 20001 (DPlus protocol)
UDP port 30051 (DCS protocol)
UDP port 8880 (DMR+ DMO mode)
UDP port 62030 (MMDVM protocol)
UDP port 10100 (AMBE controller port)
UDP port 10101 - 10199 (AMBE transcoding port)
UDP port 12345 - 12346 (Icom Terminal presence and request port)
UDP port 40000 (Icom Terminal dv port)
UDP port 21110 (Yaesu IMRS protocol)
Transcoding with an AMBE USB Stick
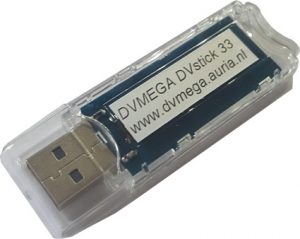
After reading around online for a bit, my current plan is to setup and use the DVMEGA DVstick33. I originally found the DVstick30 while googling around, but it has only one channel, so I would need to purchase two of them for my current application. Conversely, the DVstick33 is based on the AMBE3003 chip and can do 3 channels of transcoding simultaneously. Price-wise, buying one DVstick33 is about the same as purchasing two DVstick30s, and I'll get three channels instead of just two, so I figured it was a good plan.
While reading around, I eventually came across a note in one of the items' description that if you wanted to purchase the DVstick33 to email a gentleman by the name of Guus at info@auria.nl. Guus is very nice and helpful. I paid via PayPal and shipped it very quickly. It shipped from the Netherlands and arrived here in Nebraska in about ten days.
I installed the USB stick into my tower running my XLX server. The first thing that we'll want to do is to install the FTDI drivers for chip inside the USB stick. For this process, I started with a script written by N5AMD (link). The original script is written for Debian 9, so I de-constructed the script and ported it for Ubuntu. It is a fairly similar process, with only subtle differences. If you're okay with using Debian, the script is a much easier process and I highly recommend it. If not, or you wanna do it the hard way to do some learning about the installation process, follow along. Let's dig in!
Installing the FTDI Drivers
The first thing that we'll want to do is to create a folder for our ambed files that will do the transcoding. We'll create a folder in the root / directory named ambed. Inside of /ambed, we'll create a folder called install-files, where we'll download the install files to.
sudo mkdir /ambed
sudo mkdir /ambed/install-files
There are several drivers available from FTDI, depending on what your CPU architecture and o/s are. FTDI has a good guide for installing the drivers (link). Here's a summary of the Linux drivers taken from the Linux installation guide:
- x86 – for 32-bit IA-32 CPUs
- x64 – for 64-bit Intel-64 (x86-64) CPUs
- ARM – for ARM CPUs
- MIPS32 – choice of hard-float and soft-float.


"Oh no, Construction!" - Please bare with me if you find a mistake or something currently left out. Also feel free to email me if you find any mistakes, wanna make suggestions, or just found this helpful in some way, or just flat hated it. Please send emails to: tanner.j.sterling@gmail.com.
Update: 24 May 2023
Hello all! If you've been following along, then I'm sorry that I haven't updated this page in way too long. I was able to get the AMBE USB stick installed and recognized, but just not transcoding. I'm wondering if I goofed something with one of the drivers. Anyways, still feel free to email, if you have any questions or comments. And definitely please feel free to email me if you found a mistake that I have made. Thank you all! 73, KD0KX
Sources and Additional Resources
LX3JL's GitHub Page (Source Code from Above)
N5AMD's Digital Voice Resource